How to Build a Custom Mechanical Keyboard from Scratch

I’ve spent the last decade looking at the underside of circuit boards and scrutinizing the tolerances of injection-molded plastic. If there is one thing I learned in hardware QA, it’s that "premium" is often just a marketing term for "overpriced." Most of the high-end mechanical keyboards hitting the market today are built with the same shortcuts: cheap stabilizers, scratchy switches, and thin PCB coatings. They charge you a premium for a brand name while delivering a mediocre typing experience.
Building a custom mechanical keyboard from scratch isn't just a hobby; it is a way to bypass the marketing fluff and engineer a tool that actually meets your specific tactile and acoustic requirements. Whether you want a heavy, thocky typing experience or a lightning-fast response for gaming, building your own ensures you aren't paying for a brand's R&D mistakes. In this guide, I will strip away the hype and walk you through the technical components and the assembly process.
The Anatomy of a Custom Keyboard
Before you spend a single cent, you need to understand the hierarchy of components. A keyboard is not a single unit; it is an assembly of several specialized parts that must be compatible. If you mismatch your plate thickness with your switch type, or your PCB with your case, you are going to end up with a pile of expensive, non-functional scrap.
1. The Brain: The PCB (Printed Circuit Board)
The PCB is the most critical component. It dictates the layout (ANSI, ISO, or specialized compact layouts) and the functionality. As someone who has seen too many poorly traces on cheap boards, I recommend looking for a PCB that supports hot-swappable sockets. While soldering is more permanent and can offer a slightly more stable connection, hot-swap sockets allow you to change switches without a soldering iron. This is vital if you decide you want to experiment with different actuation forces later.
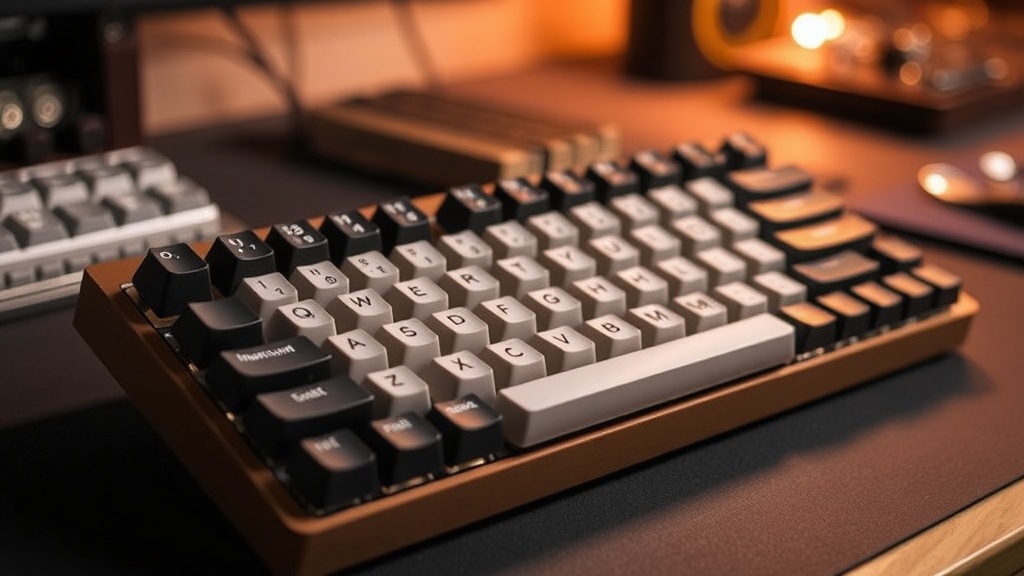
2. The Skeleton: The Case and Plate
The case provides the structural integrity and heavily influences the sound profile. Aluminum cases feel premium and heavy, but they can be loud and "pingy" if not dampened correctly. Plastic (ABS or Polycarbonate) tends to produce a deeper, more muted sound. The plate is the sheet that holds the switches in place. Common materials include:
- Brass: Very stiff, high-pitched, and heavy.
- Aluminum: A balanced middle ground.
- FR4 (Fiberglass): Offers a bit of flex, which can be easier on your fingers during long typing sessions.
- Polycarbonate: Soft, bouncy, and great for deep "thock" sounds.
3. The Tactile Experience: Switches and Stabilizers
This is where most manufacturers cut corners. A switch consists of a housing, a stem, and a spring. You have three main categories: Linear (smooth movement), Tactile (a bump you can feel), and Clicky (audible click). p>Don't trust the "pre-lubed" claims on many budget switches. In my testing, "factory lubing" is often inconsistent and can actually create more friction if applied poorly. I always recommend buying high-quality switches and lubing them yourself with Krytox 205g0 for a consistent, professional feel.
Stabilizers (or stabs) are the parts that keep your larger keys (Spacebar, Shift, Enter) from wobbling. If you use the cheap, clip-in stabilizers that come with generic kits, your spacebar will rattle like a bag of marbles. Invest in screw-in stabilizers; they provide a much more secure connection to the PCB.
The Essential Tool Kit
You cannot build a high-quality board with just your hands. To avoid the frustration of a subpar build, you will need the following:
- Precision Screwdriver Set: For the case screws and stabilizer mounting.
- Switch Puller and Keycap Puller: To prevent damaging the PCB or the stems.
- Lubricant (Krytox 205g0 or Tribosys 3203): For smoothing out switches and stabilizers.
- Small Paintbrush: For applying lubricant to tiny components.
- Tweezers: For handling small parts and testing PCB traces.
If you are currently upgrading your workspace, you might be interested in the rise of minimalist desk setups, as a custom keyboard is often the centerpiece of a clean, functional aesthetic.
Step-by-Step Assembly Guide
Step 1: Testing the PCB
Do not skip this. Before you install a single switch, plug your PCB into your computer and use a website like "Keyboard Tester." Take a pair of tweezers and touch the two metal contact points of every single switch socket. If a key doesn't register on the screen, you have a dead socket or a faulty trace. It is much easier to return a defective PCB now than to realize it after you've spent hours building the board.
Step 2: Preparing the Stabilizers
This is the most time-consuming but most rewarding part. To eliminate the "rattle" that plagues cheap keyboards, you must lubricate your stabilizers. Apply a thin layer of lubricant to the metal wires where they enter the plastic housing. If you are feeling advanced, look into "wire balancing"—ensuring the metal wire is perfectly straight before installation. A well-tuned stabilizer is the difference between a toy and a professional tool.
Step 3: Installing the Plate and Switches
Lay your plate over the PCB. Start by installing switches in the corners and the center to ensure the plate is seated correctly. When inserting switches, ensure the metal pins are perfectly straight. If a pin is even slightly bent, it will fold during insertion and fail to make contact, or worse, it could short out the PCB. I always use a magnifying glass to inspect the pins after every five switches. If you're working in a dark room or late at night, remember that mastering dark mode for better eye comfort can help reduce the strain of looking at small, intricate parts.
Step 4: Mounting the PCB into the Case
Once the switches are all in and tested, it's time to secure the assembly into the case. Be mindful of the mounting style. Some boards use a "tray mount" (screwed directly to the bottom), while high-end boards use "gasket mount" (the plate is sandwiched between foam or rubber gaskets). Gasket mounting provides a more cushioned, consistent typing feel and is much better at absorbing vibration.
Step 5: Adding Keycaps and Final Testing
The final touch is the keycaps. Keycap material matters: ABS is common but tends to develop a "shine" over time due to skin oils, while PBT is more durable and has a matte texture that holds up under heavy use. Once the caps are on, test the board one last time to ensure no pins were bent during the final assembly.
The Verdict: Is It Worth the Effort?
Building a custom keyboard is an exercise in precision. You will likely make a mistake—perhaps a bent pin or an unevenly lubed stabilizer—but that is part of the learning curve. The result is a device that is mathematically and tactilely superior to anything you can buy at a big-box retailer. You aren't just buying a peripheral; you are engineering a tool tailored to your exact ergonomic and acoustic preferences.
As you refine your workspace, remember that a high-quality keyboard is a long-term investment. If you are looking to integrate your new tech into a larger ecosystem, you might want to look into mastering your smart home with local voice control to complement your desktop setup, or perhaps explore how spring cleaning essentials can keep your new high-end peripherals free from dust and debris.
"In a world of planned obsolescence and marketing-driven specs, the ability to build your own hardware is the ultimate form of consumer agency." — Kieran, GadgetGuru
Stop settling for the "out-of-the-box" experience. Go build something better.
Steps
- 1
Select Your Components
- 2
Test the PCB and Stabilizers
- 3
Install and Solder the Switches
- 4
Mount the Plate and Case
- 5
Add Keycaps and Test Connectivity