Why You Should Build a Dedicated Home Server for Your Data

A user attempts to access a critical family photo archive stored on a proprietary cloud service, only to find the account locked due to a forgotten two-factor authentication device. The service provider's automated support is non-existent, and the data remains inaccessible behind a digital wall. This scenario highlights the fundamental flaw in modern data management: reliance on third-party ecosystems. This guide explains why building a dedicated home server is the only way to ensure true data sovereignty, how to avoid the hardware traps set by consumer-grade NAS manufacturers, and the specific components required to build a resilient system.
The Myth of Cloud Reliability
Marketing departments love the word "seamless." They use it to describe the experience of uploading your life to a subscription-based cloud service. However, from an engineering standpoint, "seamless" is often a eupoteism for "proprietary and restrictive." When you use a mainstream cloud provider, you are not just paying for storage; you are renting access to a black box. You have zero control over the physical hardware, the encryption protocols used by the provider, or the terms of service that can change overnight.
A dedicated home server moves the "Root of Trust" from a corporation back to your desk. When you own the hardware, you own the file system. You decide when to upgrade the drives, how to configure the RAID arrays, and how to manage the security layers. While the cloud offers convenience, a home server offers predictability. In a world of subscription fatigue and data harvesting, building your own infrastructure is a defensive move against planned obsolescence and service volatility.
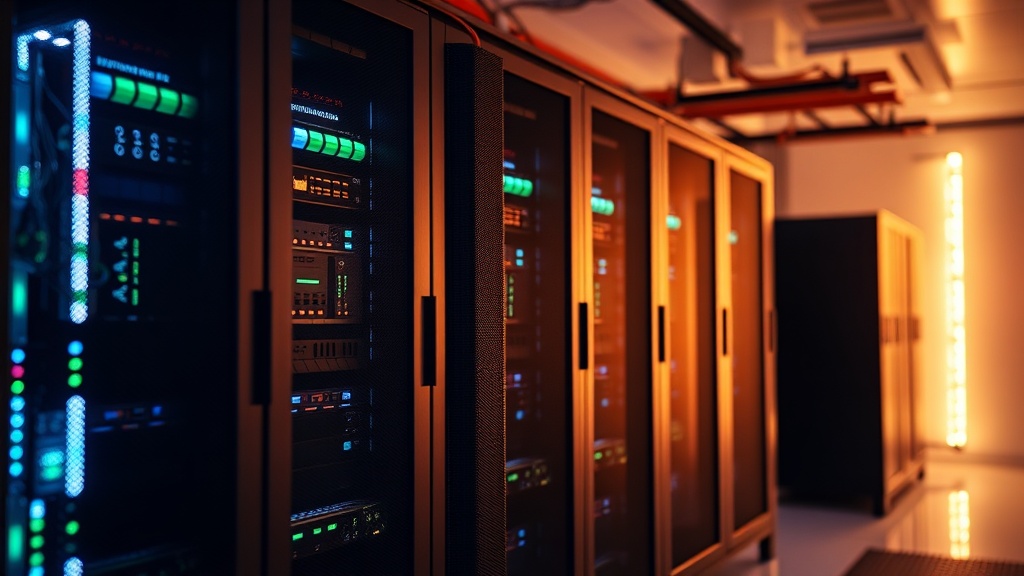
Hardware: Avoiding the "Consumer NAS" Trap
If you search for "home server," your first instinct will likely be to buy a pre-built Network Attached Storage (NAS) device from brands like Synology or QNAP. While these are functional, they are often engineered with significant cost-cutting measures that a skeptical builder should avoid. Many entry-level models use low-power ARM processors that struggle with heavy multitasking or even basic media transcoding. Furthermore, the proprietary operating systems are often "walled gardens" that make it difficult to migrate your data if the hardware fails or the company stops supporting the model.
Instead, consider building a server using standardized x86 architecture. This allows you to use widely documented Linux distributions or hypervisors. By choosing your own components, you can prioritize specific performance metrics that a generic manufacturer might overlook.
The Core Components
- The CPU: Do not overspend on high-core counts unless you are running complex virtual machines. For most home users, an Intel Core i3 or i5 (10th Gen or newer) is the sweet spot. The reason is Intel QuickSync. This hardware-accelerated video encoding/decoding is essential if you plan to run a media server like Plex or Jellycast, as it offloads the heavy lifting from the CPU.
- RAM: Capacity is more important than speed here. If you intend to run multiple services—such as a file server, a home automation hub, and a media server—simultaneously, 16GB is your absolute minimum. I recommend ECC (Error Correction Code) memory if your budget allows, as it can detect and fix single-bit memory errors that lead to data corruption.
- Storage (The Most Critical Part): This is where most people fail. Do not use standard desktop hard drives. Desktop drives are designed for intermittent workloads. For a server that stays on 24/7, you need NAS-grade drives like the Western Digital Red Plus or Seagate IronWolf. These are engineered to handle the vibrations of multiple drives spinning in close proximity and are rated for continuous operation.
- Boot Drive: Use a high-endurance NVMe SSD for your operating system. Avoid cheap, no-name SSDs; the constant small writes of system logs can burn through a low-quality drive's TBW (Total Bytes Written) rating very quickly.
Software Architecture and Data Integrity
The hardware is only as good as the logic governing it. When building a server, you must choose a file system that prioritizes data integrity over raw speed. Most consumer-grade setups use NTFS or exFAT, which are prone to corruption during power loss. For a serious home server, ZFS (Zettabyte File System) is the industry standard for a reason.
ZFS provides features like "copy-on-write," which prevents data from being overwritten in a way that could cause corruption, and "checksumming," which constantly verifies that the data you read is exactly what you originally wrote. If a bit flips on your hard drive (a phenomenon known as bit rot), ZFS can detect it and, if you have a redundant array, repair it automatically.
Structuring Your Array
You must decide on your redundancy level before you buy a single drive. A common mistake is thinking that a single RAID 0 array is "fast." It isn't worth the risk; one drive failure results in total data loss. Instead, look toward RAID 1 (Mirroring) or RAID 5/6 (Parity).
If you are building a small-scale server with two drives, a Mirror (RAID 1) is the simplest and most reliable method. If you are building a larger system with four or more drives, RAID 6 provides two layers of parity, meaning you can lose any two drives simultaneously without losing a single byte of data. This level of redundancy is what separates a "gadget" from a "professional-grade tool."
Networking and Remote Access: The Security Gap
Once your server is running, you will inevitably want to access your files when you are away from home. This is where most users create a massive security hole. Do not, under any circumstances, use "Port Forwarding" to expose your server directly to the internet. Opening a port on your router is essentially inviting every botnet on the planet to attempt to brute-force your credentials.
Instead, implement a VPN (Virtual Private Network). A solution like WireGuard or Tailscale is significantly more secure and often faster than traditional OpenVPN setups. Tailscale, in particular, is excellent for beginners because it handles the complex networking (NAT traversal) for you, creating a secure "mesh" between your phone, laptop, and your home server without requiring you to touch your router's firewall settings.
For those who want to host services that are accessible to others (like a website or a public media library), use a Reverse Proxy like Nginx Proxy Manager. This allows you to route traffic through a single, highly controlled entry point, adding a layer of abstraction between the public internet and your internal network architecture.
The Long-Term Maintenance Reality
A home server is not a "set it and forget it" device. It is a piece of infrastructure. To ensure its longevity, you must establish a routine. This includes monitoring drive health via S.M.A.R.T. (Self-Monitoring, Analysis, and Reporting Technology) and keeping your software updated to patch security vulnerabilities.
I suggest setting up automated alerts. If a drive's temperature exceeds 45°C or if the filesystem detects a checksum error, you should receive a notification on your phone immediately. If you are already comfortable with hardware customization, you might find that setting up a specialized dashboard is a satisfying way to keep your system healthy. For instance, if you have already experimented with setting up a Raspberry Pi, you will find the logic of managing a Linux-based environment very familiar.
Final Verdict
Building a dedicated home server requires an upfront investment of time and capital, but the ROI is measured in peace of mind. You are moving away from the fragile, subscription-based model of the modern web and toward a robust, self-contained ecosystem. By selecting high-endurance components, utilizing a file system like ZFS, and securing your access via a VPN, you create a data vault that is truly yours. Don't trust your digital legacy to a company's quarterly earnings report; build the infrastructure to protect it yourself.